How to make your first plugin for WordPress

I dedicate this post to all those people who, for whatever reason, use the theme installed on their WordPress to modify the functionality of their website. Not bad, obviously, but your WordPress themes don't take care of modify the functionalities of your website, but to change its appearance.
Today you are going to learn make a plugin easily and, of course, functional ????.
Contents
What is a plugin?
A plugin is nothing more than a set of files within your WordPress, located within a folder in the wp-content/plugins/ directory. These files are not intended to modify the appearance of your website, but to improve functional aspects thereof.
There are many plugin classes, but generally we can find the following types:
- Security.
- Modification of content.
- SEO.
- Backup management.
- Design modification.
- Social networks.
I am not going to go into explaining these types of plugins or many others now, since it would lengthen this entry a lot and, really, we are not here for that. But, in the near future I will make an entry delving into detail about the different types of plugins.

Steps to create a plugin
Today we are going to program a simple but at the same time very interesting plugin. In addition, we will modify both the administrator sections and the public part of the web page. To program ????!
To begin with, we will go to our desk. There, we will create a folder with the name we want to give the plugin. I will call her "My first plugin". Inside, we'll create a text file called "my_first_plugin.php". The programming language that we will use to program the plugin will be PHP, hence the file extension is ".php".
We will open the file with our favorite code editor, or failing that, with our notepad. Inside the file we will paste the code that I am going to leave here:
<?php

/**
 * Plugin Name: Mi primer plugin
 * Description: Descripción de mi primer plugin
 * Version:     1.0.0
 * Author:      mowomo
 * Author URI:  mowomo.com
 * License:     GNU GPL 3
 * Text Domain: mp
 * Domain Path: /languages
 */

// Expulsa a usuarios que intenten entrar directamente a este archivo
if ( ! defined('ABSPATH')) {
    exit;
}
Let's go by parts. In the first line we have «, which tells the computer to read the file that is PHP code.
Then we have a few lines between what are called "comments". Inside we define the plugin propertiessuch as its name, description, version, author, author's website, and license. The last two properties serve, respectively, to prepare the plugin translation. We must create within the plugin a folder called "languages" which we will leave empty.
The last section of code, just below the comment, prevents a user from going directly to that file.
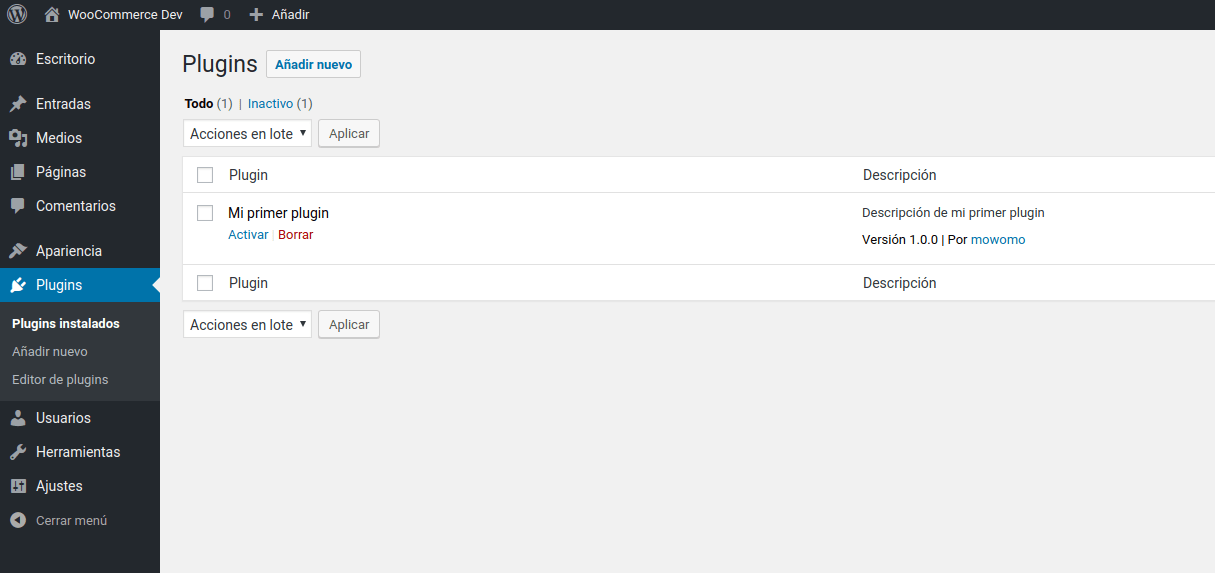
To be able to use the plugin now, we will simply have to compress the file in zip format and then upload it to our WordPress from the option «upload plugin« of page "add plugins". Currently the plugin will not do anything, but nevertheless we can already see our plugin installed in the plugin manager of our site. Hasn't it been so complicated?????
Modify the title of an entry
Let's start implementing new features in our WordPress. We are going to do something very simple, which is to add the word to the title of the new entries that we make "Present:" just ahead. To do this, we will go to our PHP file and add the following:
// Añadir "Actualidad:" delante del título de las entradas actuales
add_filter('the_title', 'mp_the_filter', 10, 2);
function mp_the_filter($title, $id)
{
if (get_the_time( 'Yd', $id ) === current_time( 'Yd' )) {
$title = __('Actualidad: ', 'mp') . $title;
};
return $title;
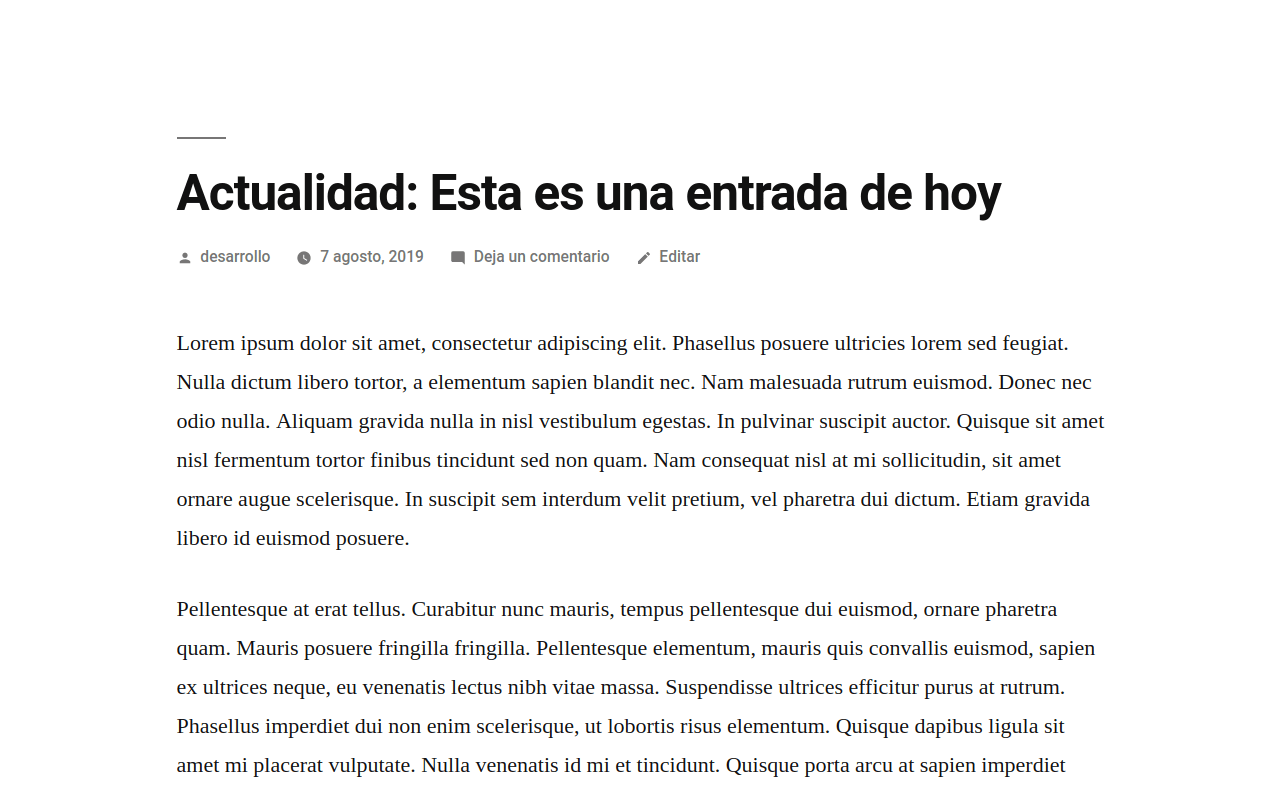
}By adding this code, we will get all the entries that are seen on the same day of their publication to show the aforementioned text in front of them. We can see the results right here:
Well, we have just added the first functionality of our life to a plugin, we can sleep easy today knowing something new ????.

Display an alert in the WordPress admin
We will finish by adding a functionality to the WordPress admin. Let's schedule a notification message that will appear above the desktop of our site, showing the text that we want. In addition, this text will only appear once, since when a user sees it, a piece of information will be saved that will prevent it from being shown again.
Let's go back to our PHP code, and paste the code below:
// Mostrar un mensaje de notificación en el administrador de WordPress sólo una vez por usuario
function mp_admin_notices()
{
	if (get_user_meta(get_current_user_id(), 'mp_mensaje_visto', true) == '') {
		update_user_meta(get_current_user_id(), 'mp_mensaje_visto', '1');
		?>
			<div class="notice notice-success is-dismissible">
				<p><?php _e('¡Este es un mensaje de notificación!', 'mp'); ?></p>
			</div>
		<?php
	}
}
add_action('admin_notices', 'mp_admin_notices');
With this code, what we will do is check if the user who loads the WordPress administrator has seen the notification message or not. If you have not seen it before, you will see it and a piece of data called "mp_message_seen" with value 1 indicating that you have already seen the message. By doing this, we will ensure that the next time you see the administrator, you no longer see the message. A whole explanation about programming in WordPress ????.
To find out if the user has the data or not, we will use the WordPress function get_user_meta and to update the data we will use the function update_user_meta. Both are very typical functions in plugins that help us programmers to know what the website users have done or not, to show or not certain information, among other possibilities.
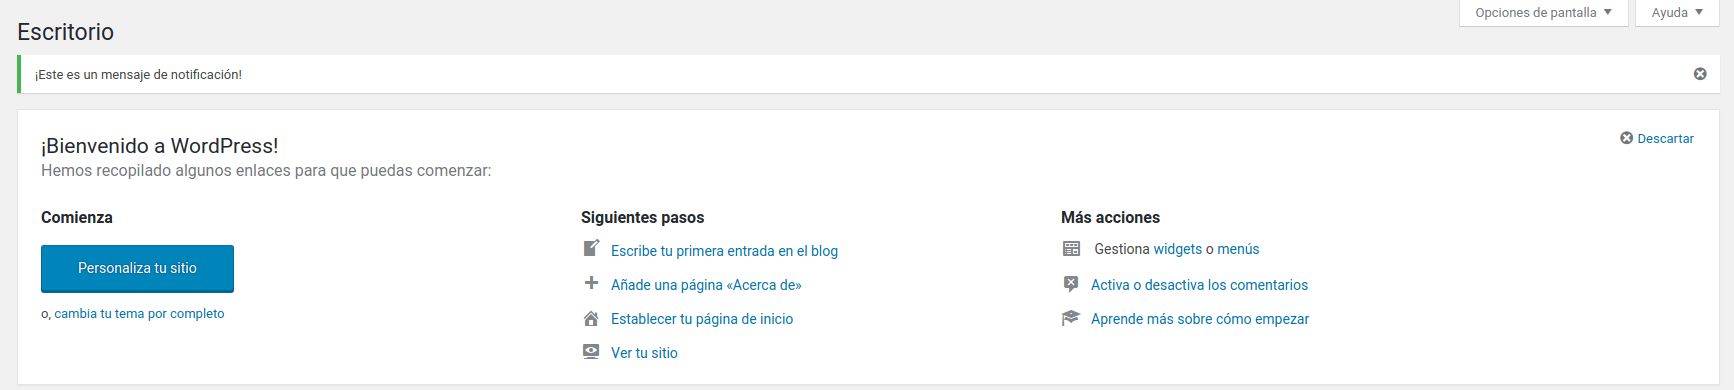
We will end up seeing this notification message in our administration panel:
Botton line
Today we learned how to add functionality in a plugin instead of in our theme's functions.php file. Besides, we know what a plugin is and some of the types that there are. To top it off, we have added new features to our site both in the public part of the web and in the administrator. Today we can sleep peacefully.
I also leave all the final code to be able to review it:
<?php
/**
 * Plugin Name: Mi primer plugin
 * Description: Descripción de mi primer plugin
 * Version:     1.0.0
 * Author:      mowomo
 * Author URI:  mowomo.com
 * License:     GNU GPL 3
 * Text Domain: mp
 * Domain Path: /languages
 */

// Expulsa a usuarios que intenten entrar directamente a este archivo
if ( ! defined('ABSPATH')) {
    exit;
}

// Añadir "Actualidad:" delante del título de las entradas actuales
add_filter('the_title', 'mp_the_filter', 10, 2);
function mp_the_filter($title, $id)
{
	if (get_the_time( 'Yd', $id ) === current_time( 'Yd' )) {
		$title = __('Actualidad: ', 'mp') . $title;
	};

	return $title;
}

// Mostrar un mensaje de notificación en el administrador de WordPress sólo una vez por usuario
function mp_admin_notices()
{
	if (get_user_meta(get_current_user_id(), 'mp_mensaje_visto', true) == '0') {
		update_user_meta(get_current_user_id(), 'mp_mensaje_visto', '1');
		?>
			<div class="notice notice-success is-dismissible">
				<p><?php _e('¡Este es un mensaje de notificación!', 'mp'); ?></p>
			</div>
		<?php
	}
}
add_action('admin_notices', 'mp_admin_notices');
If you set up a good plugin, you can always later add it to the WordPress repository, which you can learn in this link.
I hope you have learned from what is written in this entry and that it can help you in your projects. If you have not understood something, write in the comments so that I can answer and help you, do not be shy. Until another time!
¡Subscribe to our newsletter and receive our offers, news and discounts directly to your email!