Automate your WordPress thanks to AutomatorWP
¡Subscribe to our newsletter and receive our offers, news and discounts directly to your email!
Contents
Basic concepts of automation.
Automation is a concept that has been with us for a long time and it really is converting a series of actions that we have to do by hand to a series of processes that are done through technology. We do not have to think that automating will mean literally copying all the actions that we do so that a robot can do them, but rather that it goes a little further.
For example:
We have a series of dirty dishes that we must clean. The starting point is a stack of dirty dishes (point a) and the result we are looking for is a stack of clean dishes (point b).
Here we must identify what are the steps that we must follow to take me from point a to point b.
The steps to solve our dirty dishes problem would be the following:
- Gather materials for cleaning. Usually scourer and dishwashing liquid.
- Collect all dirty dishes in one place. Usually the sink sink.
- Define a place to place the clean dishes. Usually the drainer.
- We take a dirty plate.
- We rub it with the scourer until it is clean.
- We check that it is clean, if not we return to the previous point.
- Once clean we place it in the drainer.
- We check if there is room for a new plate, if not we return to point 3.
- We look if there is a dirty plate, if there is we return to step 4.
- Once finished with all the dishes we would have our clean dishes.
These actions that will lead us to the final result will be "triggered" by a cause and will cause an "effect".
Cause and effect.
Like everything in life, each action creates a reaction and to automate our processes we must identify very well what our causes (triggers) are and what our effects (actions).
These triggers, as they are commonly called, are actions that trigger a whole series of processes, similar to a domino effect.
Thanks to AutomatorWP we will be able to detect these triggers, such as a user registering on our website, visiting it for the first time or a long list of circumstances that will make it possible to create very interesting strategies.
Why would I need to automate my WordPress?
The automation of processes has an infinity of utilities and well technically all the processes that you do in your day to day could normally be automated, so if we get serious we could devise a series of processes that will carry out all the small actions that we do in our day to day. day and meanwhile we could be reading a good book, playing video games, doing sports or whatever we feel like.
And as a good friend Mr. Rafa Ramos said "Automate your online store, work 20 hours a day in it and go to sleep", so as beautiful as automation may seem, it is not the solution to everything in this life.
That if we can save large amounts of time by automating processes that we have to repeat over and over again.
What is AutomatorWP?
AutomatorWP is a plugin developed by rubengc and his team are good fellow WordPress community and better developers. They are also the creators of the best gamification plugin for WordPress GamiPress.
AutomatorWP has a great list of add-ons so you can integrate automations with other WordPress plugins, such as WooCommerce.
You can find all the list of add-ons on their website.
Let's implement our strategies to AutomatorWP.
We are going to implement a simple thing to start with, which is to send an email message to the administrator of the site when a registered user connects for the first time in the day.
It may seem useless, but if you want to keep track of the authors who connect to a certain blog every day, it can be quite useful. Obviously, for this solution we could implement other solutions such as creating a type of post so that everything is registered or a thousand other ways. But I think email is simple and a kind of automation that does the job well.
The process would be the following:
The user connects -> The system sends an email.
Here we clearly see which element is the trigger and which is the action.
Installation and commissioning.
First of all we must install AutomatorWP in our WordPress installation.
- Let's go to the plugins page.
- Click on add new.
- We are looking for AutomatorWP.
- Click on install, the little blue button.
- Wait or go to the list of plugins.
- Click on activate.
You can also upload it directly via FTP to the plugins folder found in the wp-content.
Once activated, we will see that in the navigation bar of the WordPress administrator we have a new element. A very funny little robot and on the side written AutomatorWP.
We create our first rule.
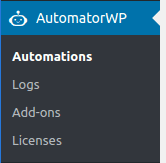
Once we click on AutomatorWP we will directly enter the Automations or automations page. Here all those automations that we have created with the plugin will appear listed.
Click on add new and we will go directly to a page to create an entry where we must include the name of the automation and different data that we will see below.
Triggers or triggers
First of all we have the triggers or triggers and first of all a small option appears where we must choose if these triggers will be sequential or not. In other words, if we are going to force the user to carry out all these steps so that the action is triggered or if they can start the process independently.
Once we are clear if the triggers will be sequential, we will click on the Add trigger or Add trigger button. A small window will appear where we can choose what type this trigger will be by default, only 2 types will come to us, WordPress or AutomatorWP trigger.
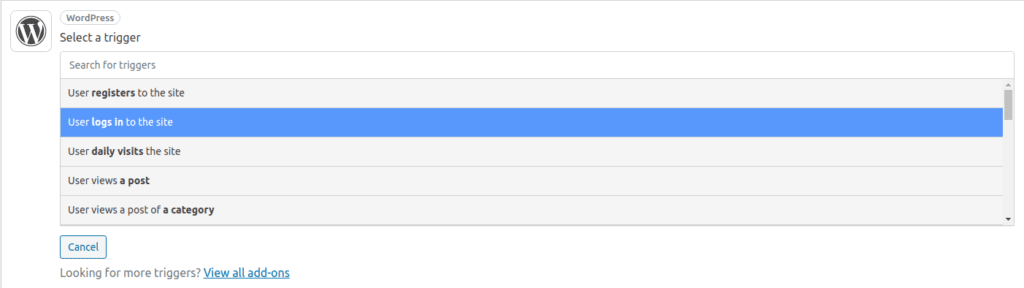
WordPress triggers are the following:
- 1 User registers to the site – A user registers on our site.
- 2 User logs in to the site – A user logs into our site.
- 3 User daily visits the site – A user visits our site for the first time that day.
- 4 User views any/specific post – A user views a specific post.
- 5 User views a post of any/specific category – A user views a post from a specific category.
- 6 User views a post of any/specific tag – A user views a post of a specific tag.
- 7 User views any/specific page – A user views a specific page.
- 8 User views a post of any/specific type – A user views a post of any/specific type type of content specific.
- 9 User publishes a post – A user publishes a post.
- 10 User publishes a page – A user publishes a page.
- 11 User publishes a post with any/specific category – A user publishes a post from a specific category.
- 12 User publishes a post with any/specific tag – A user publishes a post with a specific tag.
- 13 User comments on any/specific post – A user comments on a specific post.
- 14 User comments on a post of any/specific category – A user comments on a post of a specific category.
- 15 User comments on a post of any/specific tag – A user comments on a post of a specific tag.
- 16 User comments on any/specific page – A user comments on a specific page.
- 17 User comments on a post of any/specific type – A user comments on a specific type of content.
- 18 User gets added to any/specific role – A user gets added to any/specific role.
- 19 User role changes to any/specific role – The user role changes to a specific one.
- 20 User gets removed from any/specific role – A user gets removed from any/specific role.
You can see the entire list of triggers of other types in the AutomatorWP website.
our example
In the case that we had in mind, we will click on “User logs in to the site” – A user logs in to our site.
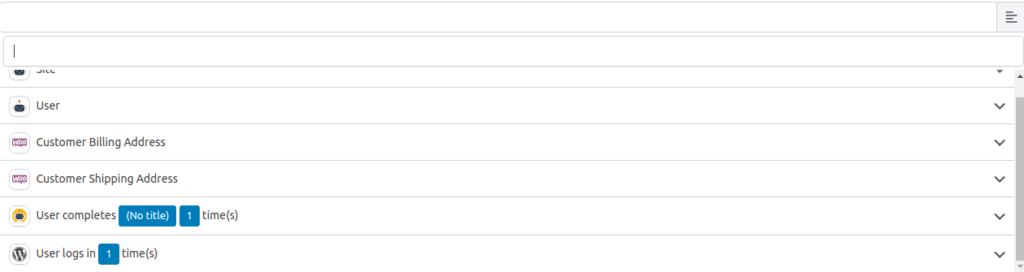
Once pressed, a section with a blank background will appear where it is written "User log [1] time(s)" or "The user logs in [1] time".

If we click on 1 or on any field that is marked in blue in the rest of the rules we will be able to customize that specific rule, in this case if we click on the number 1 we will be able to indicate how many times we want it to log in to be logged in. fire this event.
In my case I will leave it in one to send a welcome email to the person who logs into my site for the first time.
Actions or Actions
Here we repeat the same story as with the triggers. Click on add new action and here the list will be different, since we are going to choose what will happen once what has been previously defined has occurred.
In my case I am going to press a specific WordPress action to send an email.

Once that action is pressed, as you will see, we have to press and customize the word user or user. In this case, what we are going to be able to customize are all the fields of the email.
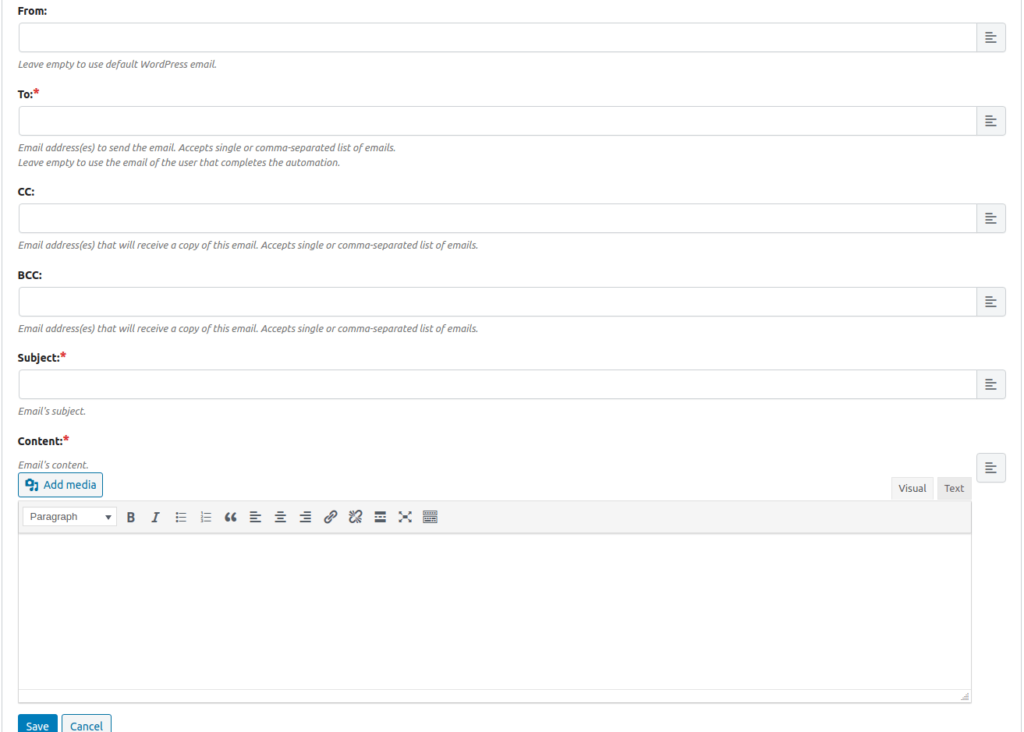
If you click on any of the fields and want to include dynamic information, such as the email of the person who has logged in that triggers the trigger that we defined before, we just have to click on the little lines that appear at the end of each one of the fields. inputs to the far right.
In this case, you would click on user in the second option and later on the specific email.

And once all the email fields are completed, we just have to save and we would have our first automation ready.
Other data we can edit
We can edit other data such as when this automation was published in case you want to schedule it to occur after a specific date. We can also edit the number of times it will be executed per user or the total number, for example that this only happens 100 times.
In principle, we could make a much longer entry explaining each and every one of the triggers and actions, but the people at AutomatorWP are so crazy that it would take us years to explain all the possible combinations that we can do if we use their add-ons.
If you have any questions about your automations, feel free to write a comment.
See you at the next entry. bye 😀
¡Subscribe to our newsletter and receive our offers, news and discounts directly to your email!