Multisite or multi-site, create multiple websites with a single WordPress installation – Part 3 – Site creation
We already have the multisite configured and now it's time to create multiple sites in WordPress
If you have come here directly, I advise you to read the two previous entries first:
Multisite or multi-site, create multiple websites with a single WordPress installation – Part 1
Multisite or multi-site, create multiple websites with a single WordPress installation – Part 2
You will see some changes, but one of the most important and not visible to the naked eye, is that for having created the network we are "Super Administrators". We are in control of everything 🙂
When you enter the WordPress administrator, once the multisite has been created, you will see that the top menu has changed.
On the one hand you will have one more item in the top menu: "My Sites"
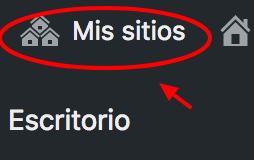
If we click on this menu item, we will see that there is an option called: “Network administrator”

And the options we have in that menu are:
What can we do with all this?
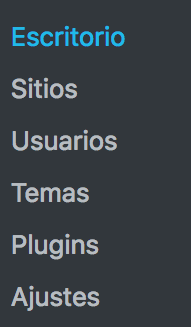
We enter Desktop and we have the following:

I will explain each element.
The menu we see as the first element "Start" From here we can see "metaboxes" that give us information such as when we open the WordPress desktop in classic version (without multisite) such as nearby Meetups, WordPress news or upcoming WordCamps.
And it also informs us that from there we can create a new site or a new user. If we are in a hurry, okay, but I prefer to go to the option to create the network administrator site that we will see now.
The following menu item is very important «Updates«. From now on, WordPress, themes and plugins updates are no longer done from the main site, they are done on the Net, and only by Super Administrators, unless we give permission to do so, which I do not advise.
The missing menu item is "Update the network". When we enter we only see a button that tells us "Update the network" what is this? Well, it is important. If we make a change that may affect all the sites that we are going to create or have already created on the network, for example, if we update WordPress or a plugin or any other change that affects the database, it is Very important to update the network. What this button does is update, in the database, the information that it contains, for each of the sites progressively, five by five.
If something fails in the multisite, one of the ways to fix it is by updating the network.
We continue with the main menu items of the network administrator, now we go with «Sites»

It's clear, we added a new site:
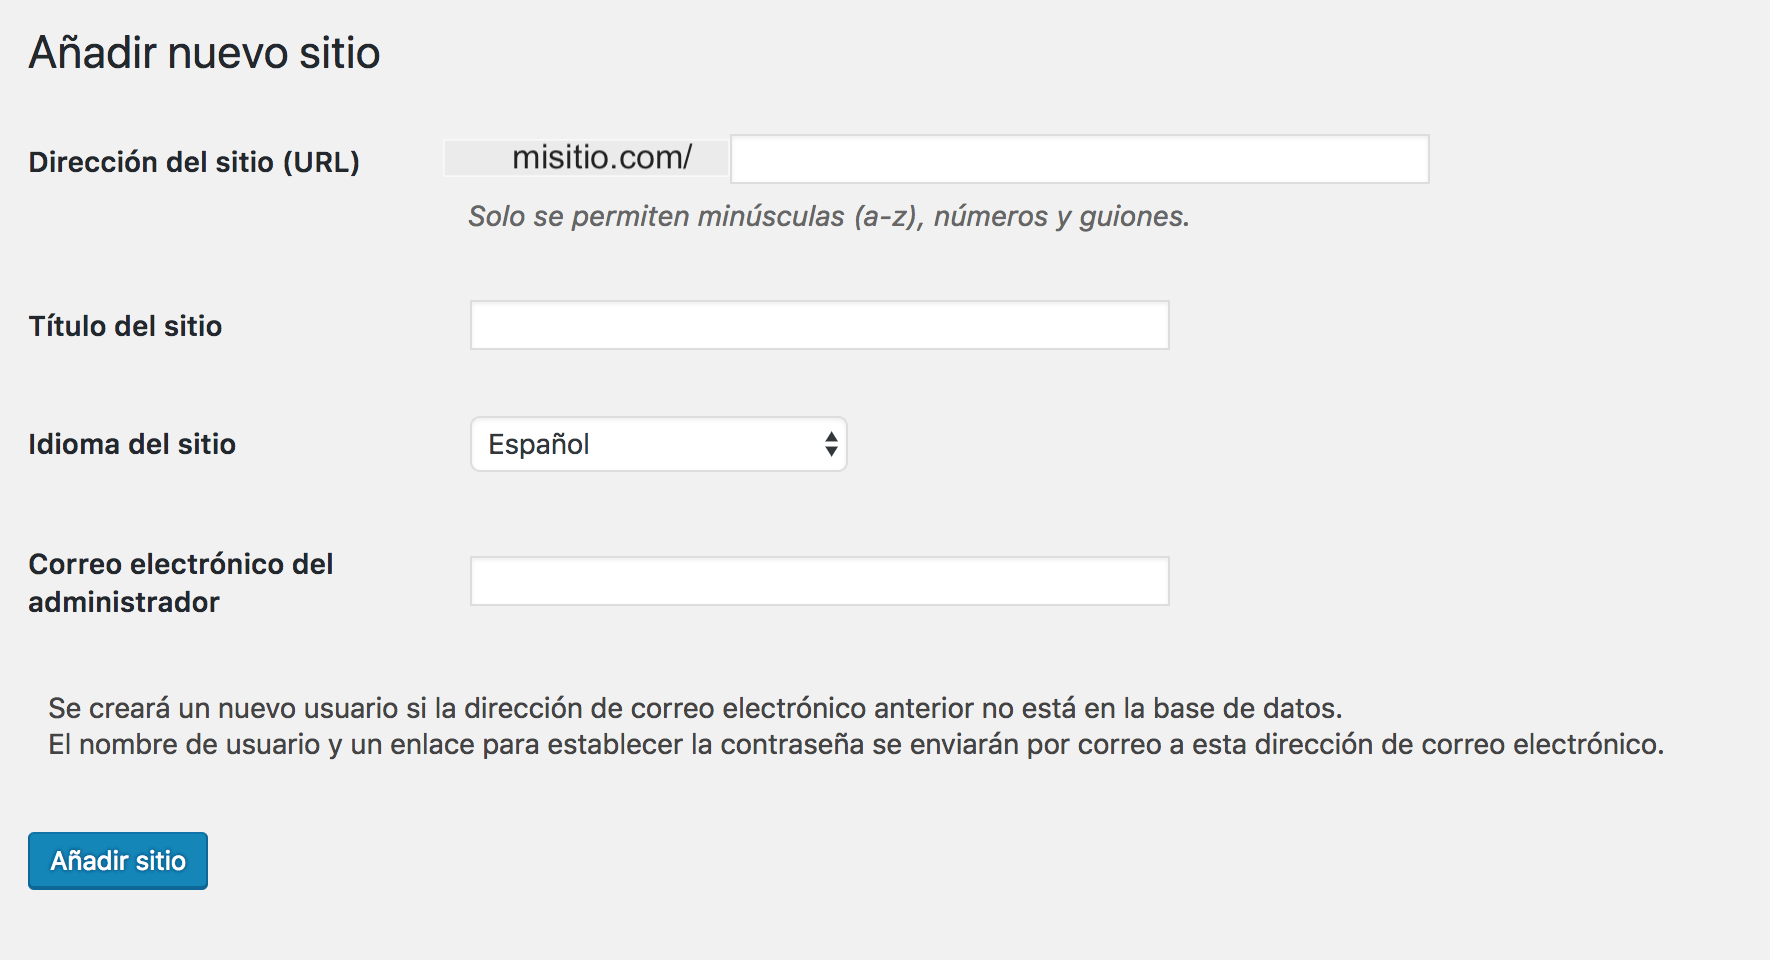
As in this case we have chosen to create the WordPress multisite as a sub-directory, it gives us the option to choose the site name just after the domain. If you had chosen sub-domain, the option to put the url would be just before it, followed by a dot and the domain

We choose the name of the site, the title, the language and very importantly, your email as administrator. It will do a search in the database and it will show you your username and your email, select it and click on add site. If you do not put the same email that you have as "SuperAdmin"
We complete the data and Bualá! You already have a site created!
In the next entry I will explain the administration of the sites, associate a topic, create users and the permissions of these users, etc.
If you need to implement a WordPress Multisite on your website or a WordPress development from scratch exclusively for you or your client, do not hesitate to contact us, and we will give you the best solution or if you need other developments ask us for a quoteYou will be pleasantly surprised at our prices. I also recommend reading the entry How much does a website made with WordPress cost?
¡Subscribe to our newsletter and receive our offers, news and discounts directly to your email!